Working with the template pipeline
This page describes how to work with the template pipeline, pipeline_template.
That repository provides a boilerplate for rapidly setting up GitHub repositories for new production pipelines.
Getting started
Preparing your project on GitHub
To start, sign in to GitHub and navigate to the template pipeline, where you will see a green Use this template button. Click it to open a new page that will ask you for some details:
Leave the default “Owner”, or change it to something better for a tutorial project.
Introduce an appropriate “Repository name”, for example
pipeline_tutorial.Make sure the project is “Public”, rather than “Private”.
Note
The template repository includes a GitHub Action workflow for continuous integration. Public repositories do not have any usage limit on GitHub Action, but private repositories do.
After that, click on the green Create repository from template button, which will generate a new repository on your personal account (or the one of your choosing). This is the repository you will use to develop and version control your new pipeline, and it contains the following files and sub-directories:
.github/workflows/build.ymlSub-directory that contains instructions for GitHub Action workflows. You will need to edit this file with instructions specific to each pipeline that is derived from the template (e.g., download test files, name of the Conda environment).
config/Sub-directory that contains configuration files for controlling the execution of the pipeline. Configurable settings may range from options passed on to programs called in individual tasks, to tabulated metadata about input files. You will edit and add files in that folder as you develop the pipeline, to provide a template and default values that can be edited by users for each run of the pipeline.
envs/Sub-directory that contains YAML files describing Conda environments for running or testing the pipeline. You will edit those files as you develop the pipeline, to provide all the dependencies that are needed for the GitHub Action workflow and end-users.
etc/Sub-directory that contains additional files needed specifically for continuous integration, you will leave it untouched.
.gitignoreGit configuration file used to ignore files to stage and commit, you will leave it untouched.
README.mdBasic description of the repository. You will edit it as you see fit.
pipeline.pyPython script that describes the pipeline steps and overall workflow. You will edit this file as you develop the pipeline, adding new tasks, importing new modules, and managing the overall workflow feeding the output of some task as the input to others.

Template pipeline on GitHub
First steps
Checking the first build
GitHub will automatically try to run the GitHub Action workflows of your project right after you create it. To see the build logs, click on the orange circle icon next to the commit ID on the project repository, or alternatively navigate to the “Action” page, then open the one on top (the most recent one).
If the build has not finished yet by the time you open it, you will see a yellow indicator, meaning that it is still in progress. However, even the logs of builds in progress can be viewed as they are being produced.
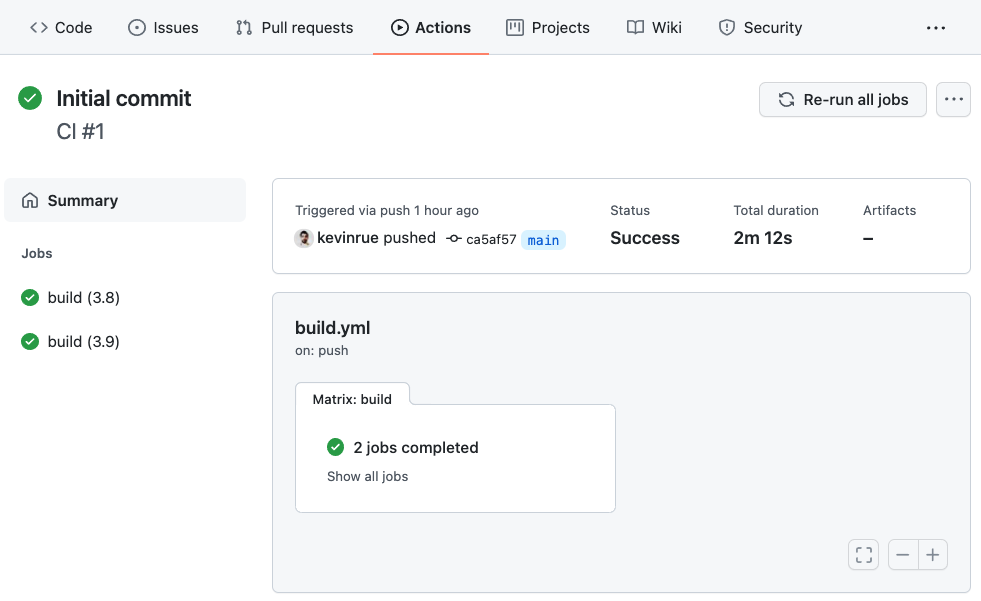
First successful build
When the build finishes, you will see a green indicator (red in case of failure), the status of the build, the elapsed time, and download links to artifacts that contain the output files generated by the pipeline. If you now click on any of the build jobs, you will see the full logs of commands run during the GitHub Action workflow, and their outputs.
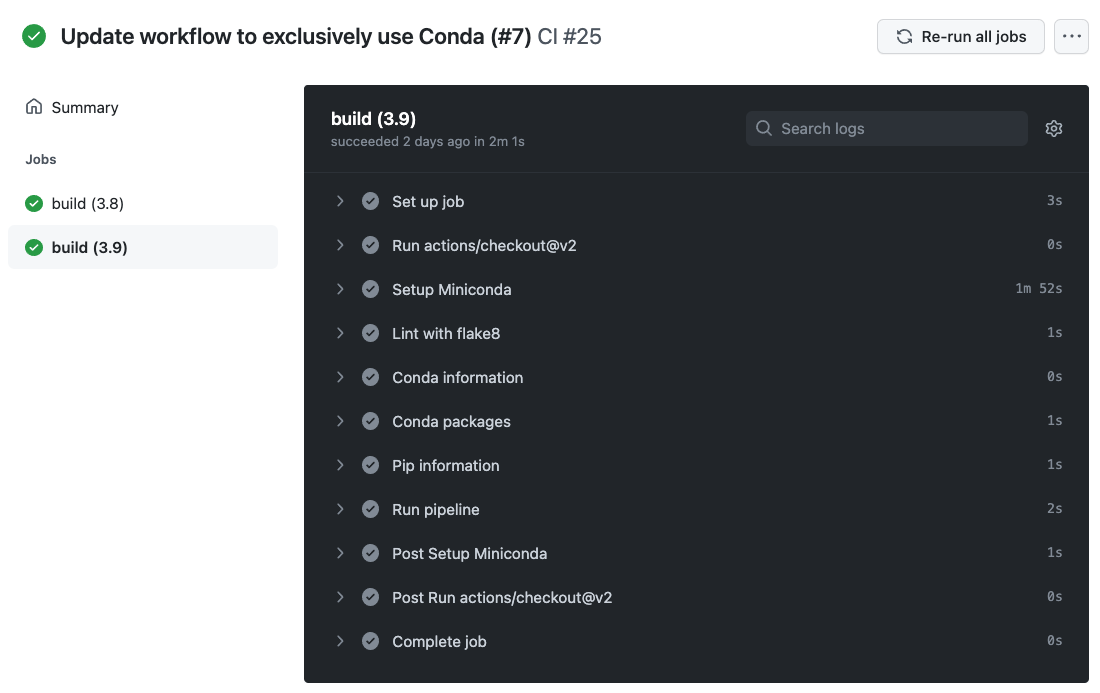
Logs of a GitHub Action workflow run
Note
The logs of GitHub Action workflows are extremely valuable in the case of failure, for debugging and fixing the pipeline (or the GitHub Action workflow itself). Some of the steps in the workflow report information about the Conda installation, and the environment in which the workflow is executed. We also encourage pipeline developers to implement unit tests that validate the outputs of the pipeline.
Basic configuration changes
You can now proceed to make some basic configuration adjustments. Navigate back to the project repository and click on the Settings button, which will open the Settings page.
First of all, click on the Branches menu, and then the Add rule button.
Set “Branch name” to
main.Tick the checkbox “Require a pull request before merging”.
Untick the checkbox “Require approvals”.
Tick the checkbox “Require status checks to pass before merging”.
In the search bar below, type “build” and select all of the options that appear (e.g.
build (3.8),build (3.9)).Tick the checkbox “Require linear history”.
Tick the checkbox “Include administrators”.
Click the Create button.
Type your GitHub account password, if prompted.
Note
The template repository includes a branch main that is used to initialise
your copy of the template. Branch protection rules ensure that contributors
to the repository respect certain best practices when publishing new updates
to the repository.
In this instance, we make sure that no one (including
administrators) can commit directly to the branch main. Instead, every
contribution must be made through a branch and a pull request.
We also block pull requests from being merged until the selected status checks pass.
Finally, we require a linear history on the branch main, meaning that
pull requests must be merge using either the “rebase” or the “squash” strategy,
resulting in a much more readable Git history on the branch main.
Trigger a build from a pull request
The GitHub Action workflow automatically triggers builds from GitHub pull requests, allowing you to verify that status checks pass before you merge the changes to the main branch of the repository.
To demonstrate this, navigate to your GitHub repository, locate the file README.md,
and click the pencil icon on the top-right with the tooltip “Edit this file”
to open a web editor.
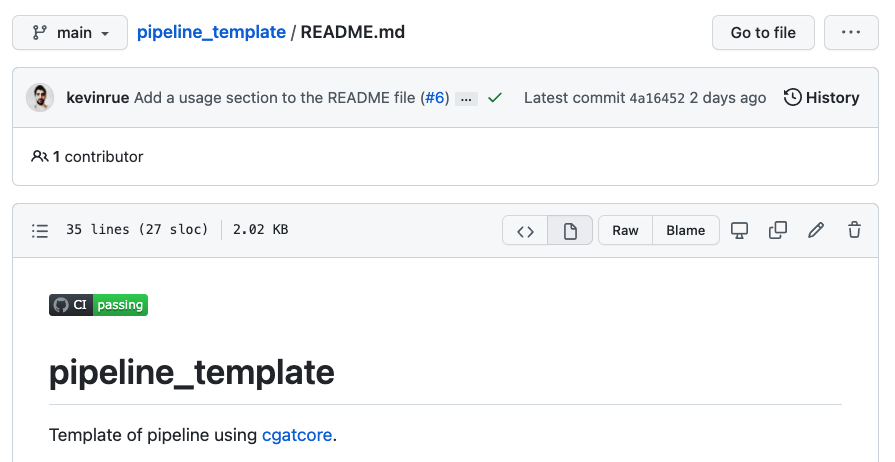
File view on GitHub before launching the editor
In the editor, in the first line, replace the two occurences of sims-lab/pipeline_template
by the name of your own repository (e.g. kevinrue/pipeline_tutorial).
Note
We are editing the code that represents the status check of a GitHub Action workflow, to display the status of your own repository. The full line representing the badge can be obtained as follows:
Navigate to your GitHub repository
Click on the Actions tab at the top of the page.
Click on the CI workflow in the left pane.
Click on the … button in the top right corner of the main pane.
Click on the “Create status badge” option.
Click on the Copy status badge Markdown button.
You can then paste this as-is, typically at the top of your
README.mdfile.
Write an appropriate commit message, and notice that the “Create a new branch for this commit and start a pull request” option is already selected (due to the branch protection rule that we set earlier). Type a name for the new branch, or use the proposed name. When you are done, click the green Propose changes button, which will take you to the new pull request page, and there click the Create pull request button below the description.
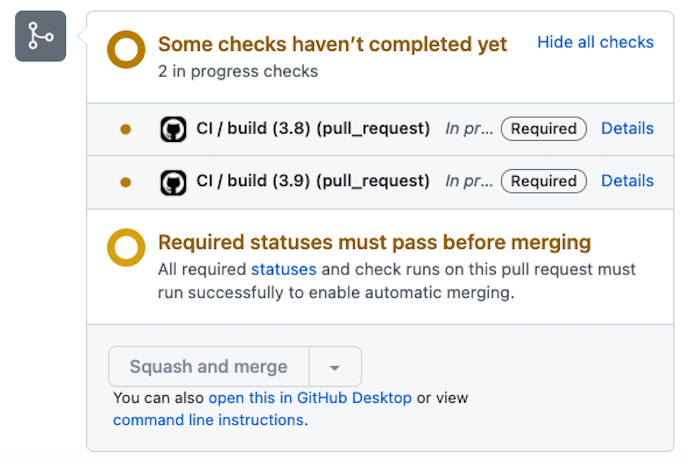
GitHub Action building the pull request.
After opening the pull request, one or more GitHub Action checks will appear (depending on the number of status checks that you selected in the page of branch protection rules). A yellow icon indicates that the workflow is running, while green or red icons indicate successful completion or failure, respectively. If you click on the Details link – while it is running or after completion – you will access the build logs. When the status checks pass and you are satisfied, you can merge the pull request!
Where to go from here
At this point, you have a working copy of a minimal pipeline that uses its own files as input data to compute a word count and load the results in an SQLite database.
You will want to edit the files in the template structure to replace their contents with your own pipeline steps, set the default configuration of your pipeline, and declare the dependencies that must be present in the Conda environments used to run and test the pipeline.
More resources will be added shortly to this documentation to continue learning about the Sims-lab pipelines:
Best practices and recommendations
Code styling
Documentation
… and more!