Using production pipelines
This page describes how to use a production pipelines to process data. To propose changes to the template of a production pipeline, refer to Developing production pipelines.
Production pipelines provide tried and tested bioinformatics workflows that are ready to be used for processing data sets. Using the example of pipeline_rnaseq_hisat2, this guide demonstrates how to set up and use a production pipeline for any suitable data set.
Getting started
Preparing your project on GitHub
To start, sign in to GitHub and navigate to the repository of the production pipeline, e.g. pipeline_rnaseq_hisat2. Click the green button Use this template to make a working copy of the pipeline for your project:
Leave the default “Owner”, or change it to something better for a tutorial project.
Introduce an appropriate “Repository name”, for example
pipeline_rnaseq_tutorial.Feel free to choose whether to make your repository “Public” or “Private”.
Note
The template repository includes a GitHub Action workflow for continuous integration. That workflow is only relevant to testing the pipeline during development and maintenance. However, its execution counts towards your usage allowance for GitHub Action in private repositories. You will not need it for using the pipeline, and a section below demonstrates how to disable GitHub Action on your repository.
After that, click on the green Create repository from template button, which will generate a new repository on your personal account (or the one of your choosing). This is the repository you will use to version control your new project, and it contains the following files and sub-directories:
.github/workflows/build.ymlSub-directory that contains instructions for GitHub Action workflows, you will leave it untouched.
config/Sub-directory that contains configuration files for controlling the execution of the pipeline. Configurable settings may range from options passed on to programs called in individual tasks, to tabulated metadata about input files. You will edit and add files in that folder with values suited to your own situation, before running the pipeline.
data/Sub-directory where you will download the input FASTQ files for this guide. In your own projects, we recommend create symbolic links in this folder, while keeping your original data files outside of this repository (mostly to avoid accidentally committing those files to Git).
envs/Sub-directory that contains YAML files describing Conda environments for running or testing the pipeline, you will leave it untouched. You will only used those files as input to create the necessary Conda environment on the system where you will run the pipeline.
.gitignoreGit configuration file used to ignore files to stage and commit, you will leave it untouched.
etc/Sub-directory that contains additional files needed specifically for continuous integration, you will leave it untouched.
README.mdBasic description of the repository. You will edit it as you see fit.
pipeline.pyPython script that describes the pipeline steps and overall workflow, you will leave it untouched.

Production pipeline on GitHub
First steps
Checking the first build
GitHub will automatically try to run the GitHub Action workflows of your project right after you create it. That workflow is designed for continuous integration during development, testing that the pipeline works as expected on a set of test input files. For the same reason, it is also a good positive control to verify that the pipeline still works as expected (on those same test files) at the time when you made a copy of it.
To see the build logs, click on the orange circle icon next to the commit ID on the project repository, or alternatively navigate to the “Action” page, then open the one on top (the most recent one).
If the build has not finished yet by the time you open it, you will see a yellow indicator, meaning that it is still in progress. However, even the logs of builds in progress can be viewed as they are being produced.
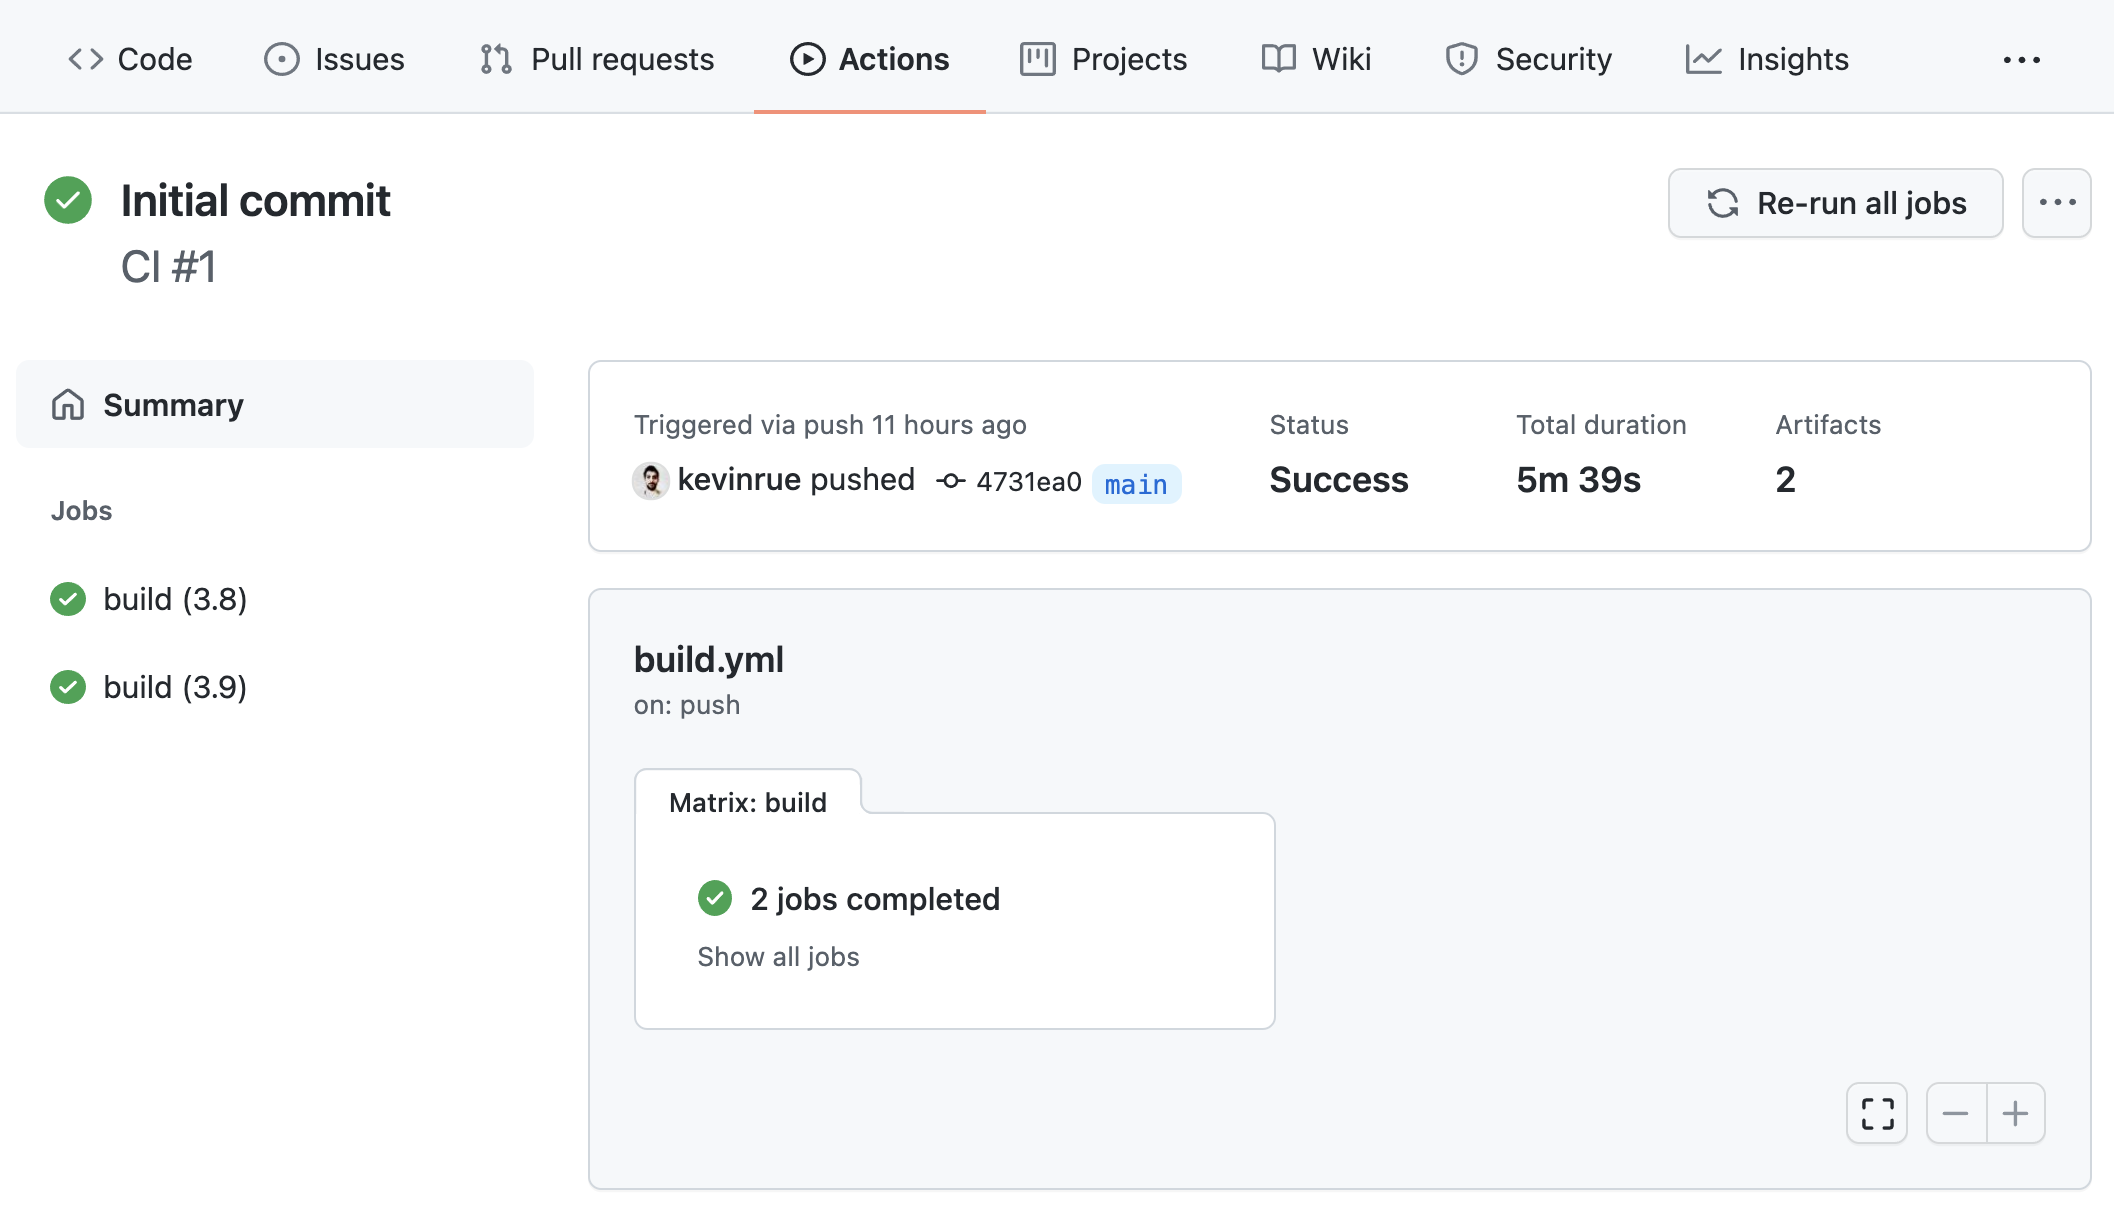
First successful build
When the build finishes, you will see a green indicator (red in case of failure), the status of the build, the elapsed time, and download links to artifacts that contain the output files generated by the pipeline. If you now click on any of the build jobs, you will see the full logs of commands run during the GitHub Action workflow, and their outputs.
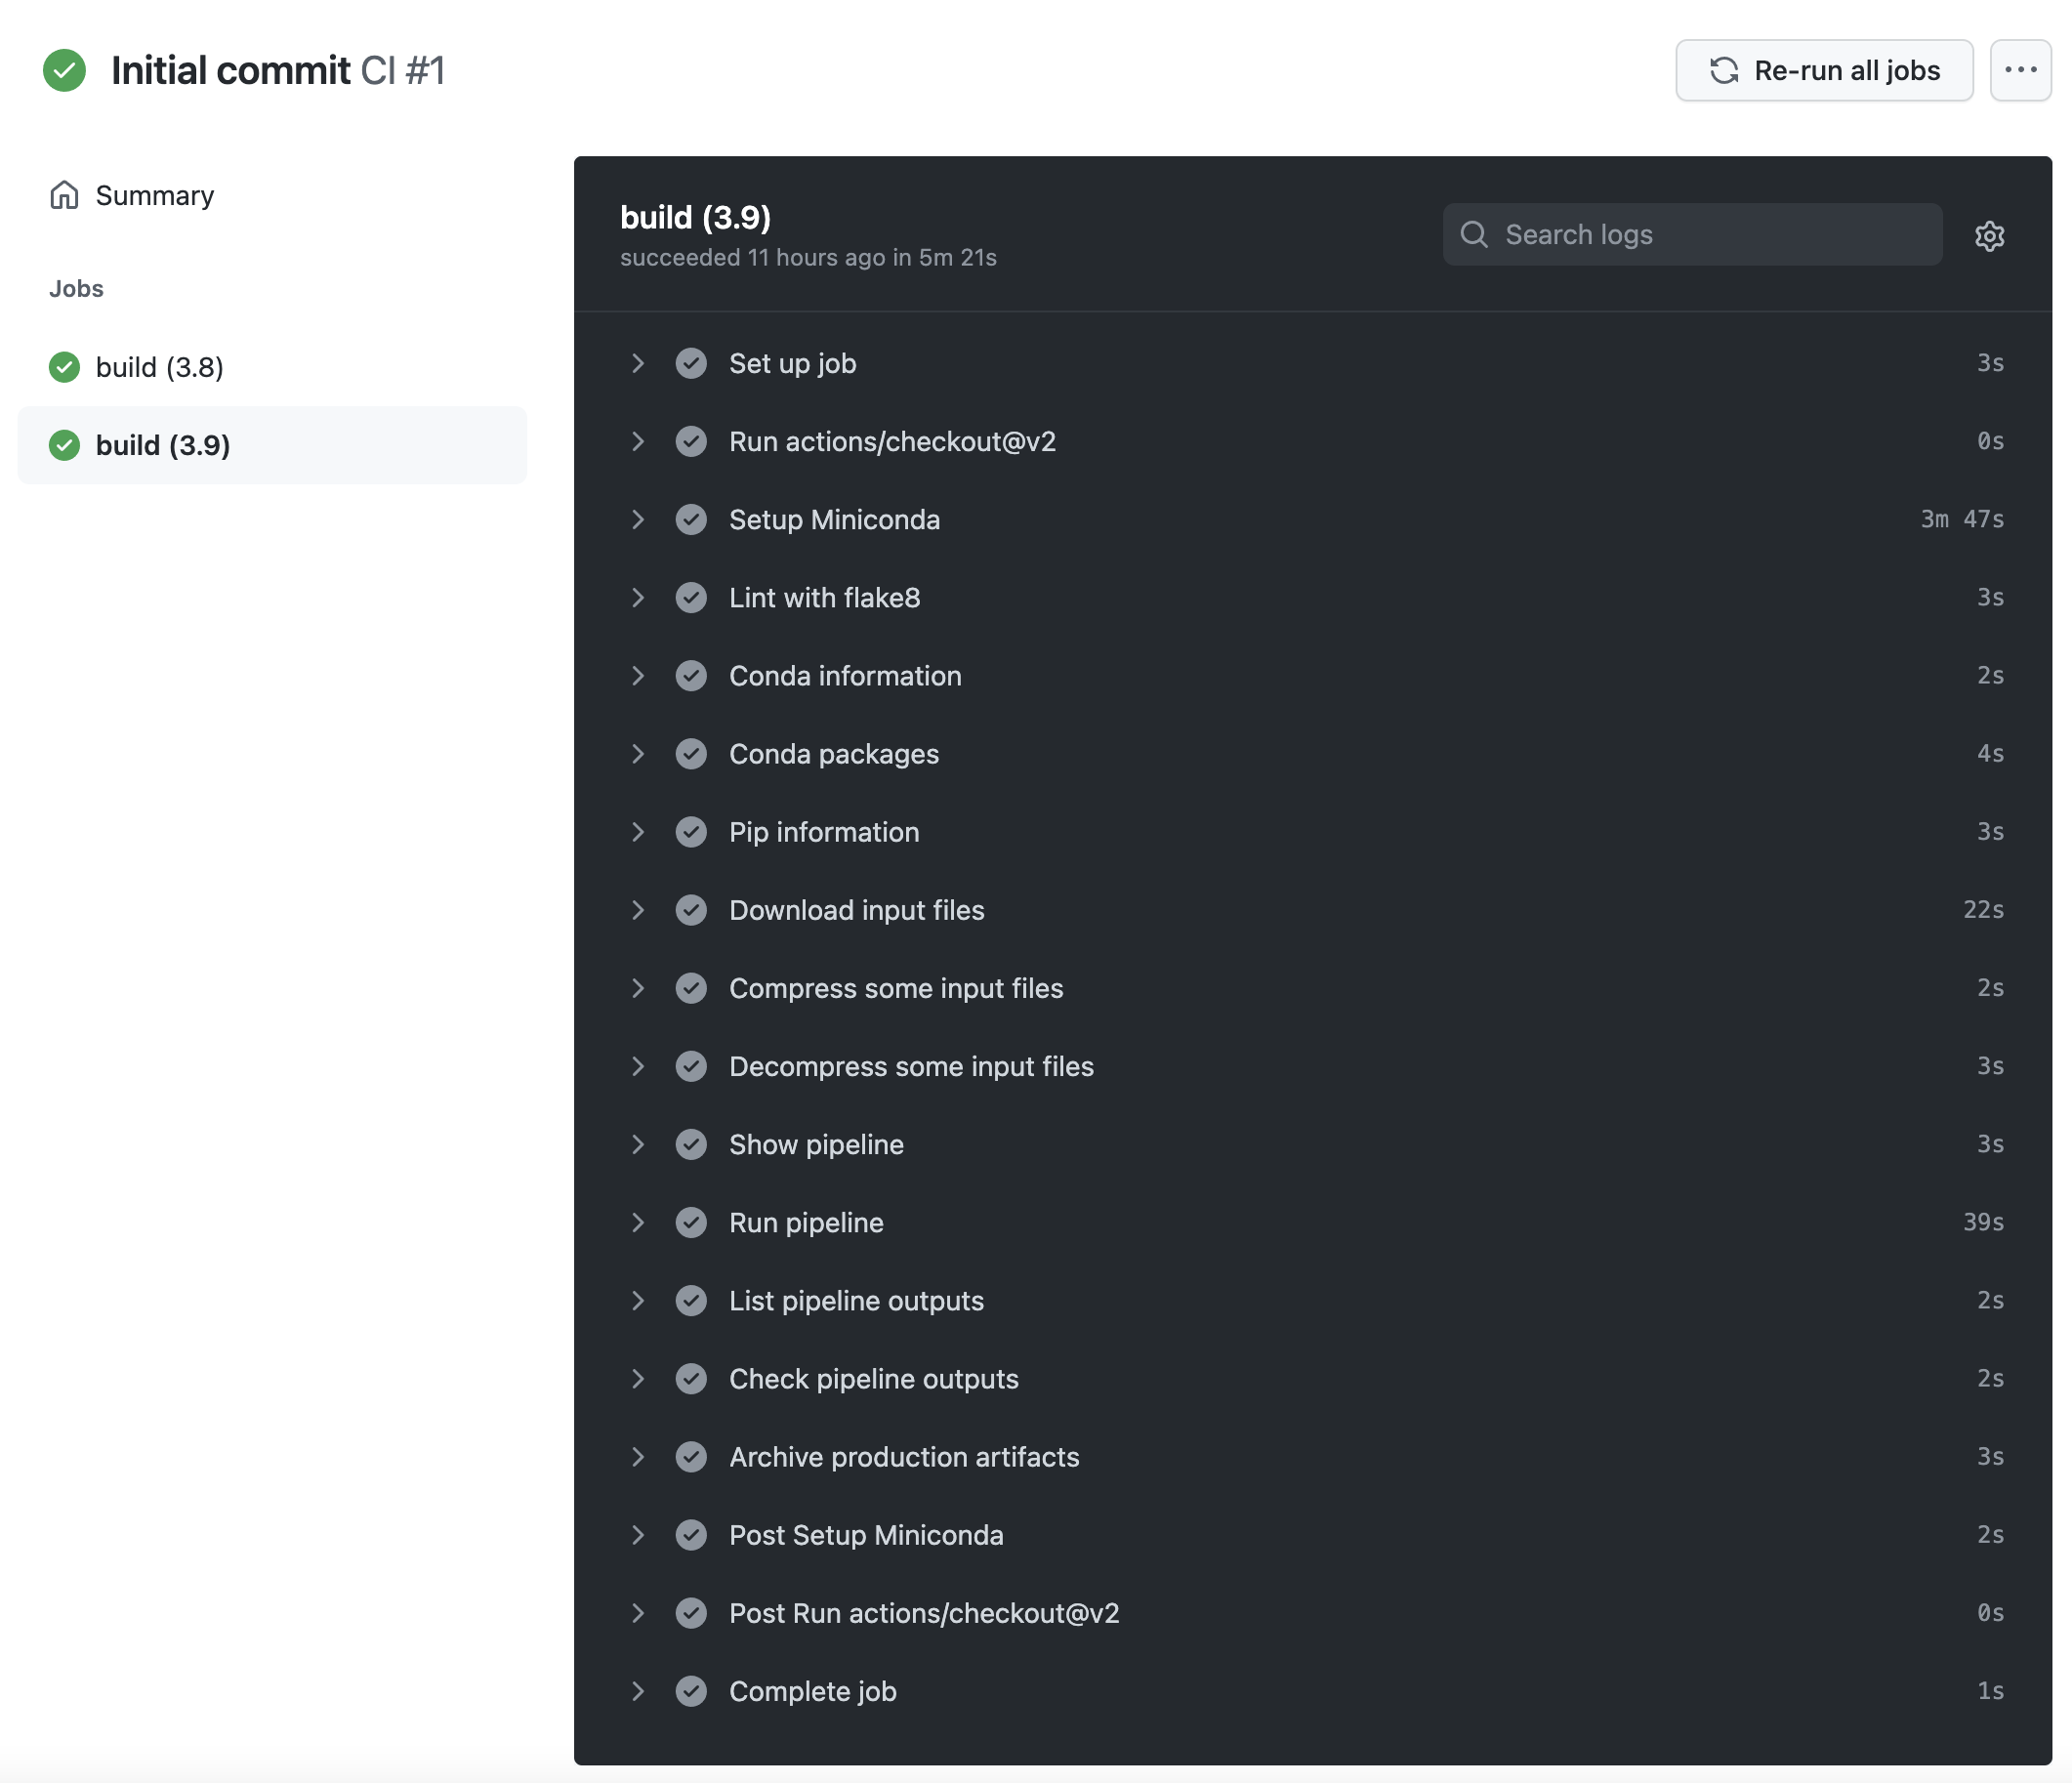
Logs of a GitHub Action workflow run
Note
The logs of GitHub Action workflows are extremely valuable in the case of failure, for debugging and fixing the pipeline (or the GitHub Action workflow itself). Some of the steps in the workflow report information about the Conda installation, and the environment in which the workflow is executed.
For production pipelines, if this first build reports a failure, we recommend opening an issue on the repository used as template (in this example, pipeline_rnaseq_hisat2), including a link to the build report of the GitHub Action workflow that failed.
Basic configuration changes
You can now proceed to make some basic configuration adjustments. Navigate back to the project repository and click on the Settings button, which will open the Settings page.
First of all, click on the Actions menu.
Set “Action permissions” to
Disable Actions.Click the Save button.
Note
In the next steps, you will edit the configuration of the pipeline to run on your own files. The modified configuration will cause the pipeline to fail on the test input files during the GitHub Action workflow; this is entirely expected as the GitHub Action worklow is only designed to validate the pipeline on the test input files.
Cloning the repository
You are now ready to clone your copy of the repository on the computer where you intend to run the pipeline. For this, you will need Git and the URL of your own copy of the repository:
git clone git@github.com:kevinrue/pipeline_rnaseq_tutorial.git
Change directory into the cloned repository:
cd pipeline_rnaseq_tutorial
Setting up input files
Add input files in the data/ sub-directory of the cloned repository.
For pipeline_rnaseq_hisat2,
those include:
a reference genome sequence (FASTA)
gene annotations (GTF)
a set of HISAT2 index files (*.ht2)
paired-end sequencing reads (FASTQ)
In this guide, we download the set of test input files used the GitHub Action workflow. Those are very small files that do not take much disk space at all, and are processed extremely quickly in the various pipeline steps.
wget \
   http://ftp.ensembl.org/pub/release-104/fasta/homo_sapiens/dna/Homo_sapiens.GRCh38.dna.chromosome.22.fa.gz \
   https://github.com/sims-lab/simulated_ngs_datasets/raw/files/human.chr22.genes2/outputs/chr22.genes2.gtf \
   https://github.com/sims-lab/simulated_ngs_datasets/raw/files/human.chr22.genes2/outputs/hisat2_chr22.1.ht2 \
   https://github.com/sims-lab/simulated_ngs_datasets/raw/files/human.chr22.genes2/outputs/hisat2_chr22.2.ht2 \
   https://github.com/sims-lab/simulated_ngs_datasets/raw/files/human.chr22.genes2/outputs/hisat2_chr22.3.ht2 \
   https://github.com/sims-lab/simulated_ngs_datasets/raw/files/human.chr22.genes2/outputs/hisat2_chr22.4.ht2 \
   https://github.com/sims-lab/simulated_ngs_datasets/raw/files/human.chr22.genes2/outputs/hisat2_chr22.5.ht2 \
   https://github.com/sims-lab/simulated_ngs_datasets/raw/files/human.chr22.genes2/outputs/hisat2_chr22.6.ht2 \
   https://github.com/sims-lab/simulated_ngs_datasets/raw/files/human.chr22.genes2/outputs/hisat2_chr22.7.ht2 \
   https://github.com/sims-lab/simulated_ngs_datasets/raw/files/human.chr22.genes2/outputs/hisat2_chr22.8.ht2 \
   https://github.com/sims-lab/simulated_ngs_datasets/raw/files/human.chr22.genes2/outputs/simulated_reads/sample_01_1.fastq \
   https://github.com/sims-lab/simulated_ngs_datasets/raw/files/human.chr22.genes2/outputs/simulated_reads/sample_01_2.fastq \
   https://github.com/sims-lab/simulated_ngs_datasets/raw/files/human.chr22.genes2/outputs/simulated_reads/sample_02_part1_1.fastq \
   https://github.com/sims-lab/simulated_ngs_datasets/raw/files/human.chr22.genes2/outputs/simulated_reads/sample_02_part1_2.fastq \
   https://github.com/sims-lab/simulated_ngs_datasets/raw/files/human.chr22.genes2/outputs/simulated_reads/sample_02_part2_1.fastq \
   https://github.com/sims-lab/simulated_ngs_datasets/raw/files/human.chr22.genes2/outputs/simulated_reads/sample_02_part2_2.fastq \
   -P data
Note
In practice, we discourage users from storing the actual files inside the clone of the repository.
Instead, we recommend users to store the original files in a separate location on the computer,
and create symbolic links to those files in the data/ sub-directory of every project that
uses them.
There are several reasons for this:
Mitigate the risk of accidentally committing large files to Git.
Avoid redundant disk usage for files that are used in multiple projects.
Create an opportunity to give symbolic links human-readable names often friendlier than the original file names (e.g., FASTQ files produced by sequencing facilities).
If accidentally commited to Git, symbolic links are extremely small files, that will not any significant issue in the Git repository.
In this case, the pipeline requires gene annotations and sequencing reads in gzip-compressed file formats.
However, we provide those file uncompressed for readability on the GitHub repository, thanks to their small file size.
Thus, we need to use the gzip program to compress the relevant files:
gzip \
   data/sample_01_1.fastq \
   data/sample_01_2.fastq \
   data/sample_02_part1_1.fastq \
   data/sample_02_part1_2.fastq \
   data/sample_02_part2_1.fastq \
   data/sample_02_part2_2.fastq \
   data/chr22.genes2.gtf
Conversely, the pipeline requires the reference genome sequence in plain text – i.e., uncompressed – FASTA format.
However, we downloaded the test input file in compressed format directly from the Ensembl FTP portal,
as its considerable file size does not motivate the hosting of an uncompressed version alongside
the other test files, and there is no good reason to subset that file to a shorter reference sequence.
Thus, we need to use the gzip program to decompress the file:
gzip -d data/Homo_sapiens.GRCh38.dna.chromosome.22.fa.gz
Note
In practice, the data/ sub-directory often only contain input files associated with
experimental samples processed and tracked through the pipeline.
Other “accessory” files needed by specific steps of pipelines are often
stored in separate directories, for discoverability and re-use across projects.
For instance, many high-performance computing (HPC) clusters arrange shared folders
providing mirrored files for gene annotations and reference genome sequences.
It is also possible to create a sub-directory next to the data/ sub-directory
(e.g. resources/), to store those files within the repository of the project itself.
Do be careful not to commit those large files to the Git repository though!
Configuring the pipeline
Now that the input files (or their symbolic links) are in place, you have all the information that you need to configure the pipeline before running it.
The configuration of a pipeline is stored in the file config.yml.
Initially, that file contains the configuration needed to run the pipeline in the GitHub Action workflow that performs continuous integration checks during pipeline development and maintenance. In most cases, you will need to edit that configuration and set values that match your own data set. In this guide, we use the same test input files as the GitHub Action workflow, and we also set up those files in exactly the same layout, so there is nothing to change in the configuration file!
Note
In practice, you will edit the configuration file to fit your own project. We recommend committing those changes to Git and pushing them to your copy of the repository on GitHub each time you run the pipeline, so that you track your efforts and give yourself the opportunity to revert to an earlier configuration, if you ever wish to do so.
Setting up the Conda environment
At this point, all the input files are in place, and the pipeline is configured and ready to run. However, your session environment likely does not include all the software dependencies that are required to execute each step of the pipeline.
Each production pipeline includes YAML files that describe Conda environments needed to run the
pipeline.
Specifically, the file envs/pipeline.yml contains the minimum set of dependencies to run the
pipeline (other environments include additional dependencies required for continuous integration and testing).
You can create the Conda environment necessary to run the pipeline as follows:
mamba env update --name pipeline_rnaseq_hisat2 --file envs/pipeline.yml
Note
We recommend mamba as a faster alternative to conda for creating
the Conda enviromment.
Refer to Installation for installing mamba.
Once the installation is complete, you will need to load the Conda environment before you can run the pipeline:
conda activate pipeline_rnaseq_hisat2
Showing the pipeline plan
The cgat-core pipeline engine include functionality for previewing the set of commands that will be executed when the pipeline is run, without executing them yet.
python pipeline.py show full
The command will print the name of the pipeline tasks that will be executed when you decide to run the pipeline.
You can display more detailed information by increasing the verbosity of the command:
python pipeline.py show full -v 5
In this case, the name of input and output files for each pipeline task is displayed. This is particularly helpful for pipeline tasks that process multiple sets of files in parallel, indicating which sets of files will be processed together, and what their respective output files will be named.
Running the pipeline
Having examined the pipeline plan, if you are satisfied with it, you are then ready to run the pipeline:
python pipeline.py make full
Note
Similarly to the show command, you can increase the verbosity
of the logs.
We recommend python pipeline.py make full -v 5 to collect
the maximum amount of information, in particular the reporting
of every job for every pipeline task.
If the Distributed Resource Management Application API (DRMAA)
is not supported on the computer where you wish to run the pipeline,
you can run the pipeline using the --local option,
i.e., python pipeline.py make full --local.
Checking the pipeline outputs
The pipeline pipeline_rnaseq_hisat2
stores all its output files in the sub-directory results/ (automatically created
if it does not exist yet).
You can list, navigate, and open sub-directories and files to inspect their contents:
ls results/
less results/featureCounts/counts.log
Note
We recommend all production pipelines to write their output files
in a sub-directory named results/.
This makes it extremely easy to rapidly remove the outputs of a pipeline run
– for instance, after a failed run – before running it again from the top.
Where to go from here
This is the end of the guide. You started by making a copy of the production pipeline as a new repository on GitHub, and cloning it to the computer where you decided to run the pipeline. Then, you set up input files for the pipelines, configured the pipeline, and set up a Conda environment in which you executed the pipeline, watching output files being created and logs being generated in the console.
More resources will be added shortly to this documentation to continue learning about the Sims-lab pipelines:
Best practices and recommendations
Code styling
Documentation
… and more!